A few people have asked me about the recipe for getting good family pics, so I thought I would put down a quick tutorial for all you guys out there with a DSLR. Here’s what you need:
1 – A DSLR set to “Aperture Priority” mode
2 – A fast lens (i.e. with a wide aperture – say f/2.8 or higher – f/2.5, f/2, f/1.8, f/1.4, etc)
OR
3 – A lens with a long focal length (say 100mm or higher)
OR
4 – A combination of 2 and 3 – a lens with a long focal length and wide aperture – THE IS THE IDEAL SCENARIO BUT IT IS ALSO THE MOST EXPENSIVE!
5 – Good lighting!
6 – A non-distracting background
Taking each of the above a step at a time (without getting into too much boring detail!):
1 – A point and shoot (P&S) camera is great in terms of portability and for taking landscape pictures, but the price you pay for these areas is in the area of creativity. Basically, a P&S camera does not allow you to selectively focus anything so everything in the image is 100% crystal clear (which is why they’re good for landscapes). A DSLR camera is bigger and heavier, but it has the advantage, amongst many other things, of being able to focus on a single subject. Using “Aperture Priority” (Av mode on a Canon or A on a Nikon), allows you to control how much of your image is in focus. A DSLR also allows you to use different lenses, which leads me to…
2 – A fast lens is the quickest and easiest way to start experimenting with selective focusing and depth of field (DOF). Canon and Nikon both make very cool and inexpensive little 50mm f/1.8 lenses. Don’t worry about all the numbers for now, just get one and you’ll soon see why they’re so cool. They cost about $100, which is about as cheap as it gets when you’re looking at lenses. Put it on your camera and open the aperture up using the little wheel (you’re in Av mode remember?) to f/1.8. Make sure you focus on the eyes when taking your photo – this is crucial at such a wide aperture as very little will be in focus. Everything else in the photo can be blurry but the eyes need to be sharp.
3 – We’ll come back to this in a minute!
4 – And this too!
5 – OK, probably the single most important thing about an image is the lighting. You can have the most professional gear possible and take a picture that looks horrible if the lighting is off. One of the other good things about a DSLR is the fact it has a much larger sensor than a P&S, which, combined with a much bigger lens, allows more light to be picked up, which means you don’t need to use a flash as often as you do with a P&S. My advice is to leave the flash off unless you really need it. Now, if you’re taking a picture of someone and you’re indoors go to a window and have them face it without having them actually standing in the pool of light. If you’re outside, try and get out of direct sunlight by standing in the shade or under a tree or something (try to avoid dappled light if you can though). Using the window light or going into what’s called “open shade” should give you nice diffused lighting and nice catchlights in the person’s eyes. Here’s an example taken with window lighting and a 50mm lens set at f/1.6.
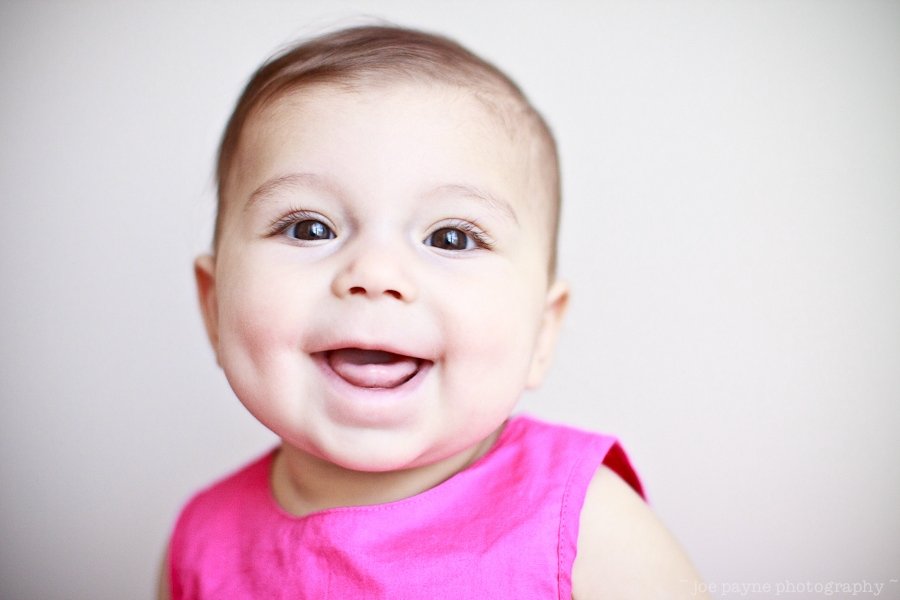
6 – Apart from the lighting, we generally want to have our subjects stand out in the photo, which means not having too much going on in the background. In the image above, we were indoors by a window and had a white wall directly behind our subject (the beautiful Abbey!); it doesn’t get any less distracting than that. If you’re not able to get by a plain background (you don’t have to by any means, it’s just what we had on hand where we were shooting) or if you’re outside, try to get a good distance between your subject and anything in the background so the person stands out more. Here’s an example inside at f/1.8:
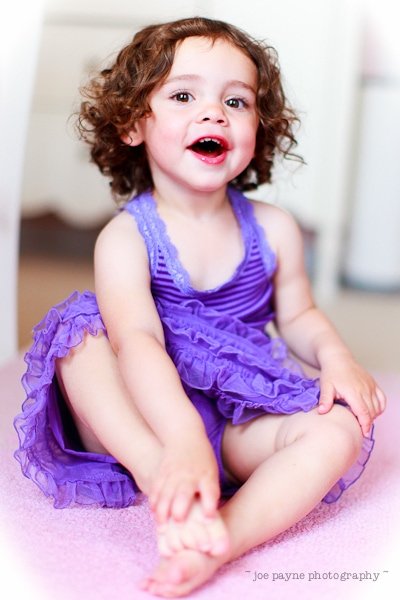
and one outside at f/1.8:

If we’d been right by the trees in the background, all the leaves and branches would be in focus and that cool, blurry, out-of-focus effect (called “bokeh”) would be missing. As such our subject would not stand out as much.
Going back to points 3 and 4, if you have a long lens like a 55-250mm zoom or something like that. You should follow the same instructions as above, except you should zoom your lens in as much as you can whilst keeping the aperture as wide as you can (f/5.6 or so on most lenses). If you have big bucks, you can fork out for a 70-200 lens with an f/2.8 aperture which will give you the best effect. That’s what the pros use.
I’ve skated over a lot of stuff here, but this should give you a quick recipe. Feel free to drop me a line with any questions. I’ll do my best to answer them for you.
Have fun!
